Monday, 14 December 2015

WEEK 6: INDESIGN SKILLS

After developing our skills in photoshop we moved onto using InDesign, we were shown a few basic skills to begin with:

Setting up a Page:
When you open InDesign a box will appear that looks like this:

You can adjust the page size, amount and size of columns, the size and the margins around the page and the bleed and slug (which we did not use). This way you can adjust your page to exactly how you want it to look.

Adding text and text boxes:
To add text you need to create a text box. By holding down the 'T' on the panel at the side you can select the 'Type Tool':


This allows you to click and drag anywhere on the page and create a text box of any size:


By using the bar across the top of the page you can then change the font, size of the text, space between the letters, height and width of the letter etc, similar to what we did in photoshop:


Adding pictures and picture boxes:

To add a picture you need to create a picture box where you want your picture to go, you do this by clicking on the rectangle frame tool:


You then click and drag the same as with a text box to the size you want it to roughly be and it should look like the picture below with a cross through the box:


Importing and Resizing images:

To insert a picture you can drag the photo you want from the folder straight into the rectangle frame tool in InDesign however it may not fit properly in the box you have drawn:


To resize your image to fit the box you can click the photo and see a brown frame appear which shows the actual size of your photo, by holding down shift to keep it in proportion and dragging the corners to fit the box the photo will the fit exactly how you want it to:


Another way of getting the picture to fit your box is by clicking 'Object' at the top of the page, going to 'fitting' and choosing 'Fit Frame Proportionally':


Using either way the photo will end up fitting properly in the box you have created:


Adding, creating and changing colours:

To change the colour of something you have to click 'Color' in the right hand side bar and then double click the small box with the colour in it that if you hover over should say 'Fill':


The 'Color Picker' will then come up allowing you to chose any colour you want, once chosen you can chose 'Add RGB Swatch' to add the colour to your swatches so you can use that exact shade again and find it easily if you need it:


With our new knowledge of how to use InDesign we can begin creating contents and Double Page spreads as practise for our preliminary task and main task before creating our final ones so we can develop our skills further.

Thursday, 3 December 2015

WEEK 5: DOUBLE PAGE SPREAD TERMINOLOGY

Double Page Spread Terminology:

We also looked at professional magazine double page spreads to see what makes them good and efficient:


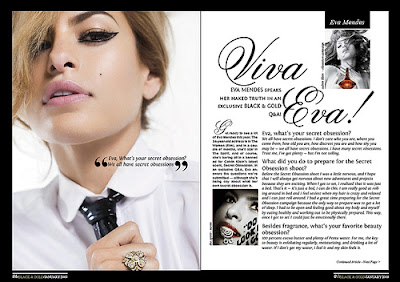
This double page spread has a standfirst which is an introductory paragraph usually in a sans serif font and slightly larger than the article itself however this spread uses a serif font in the standfirst. The title usually uses a serif font but once again this has used the opposite and has a sans serif font. The image in a double page spread is large just as this one so it stands out. This magazine also uses a drop capital which is at the start of an article, the first letter of the first word is written larger than the rest of the article and normally drops down into the article as this one does. There is one large column and no sub-columns used.


This magazine has gone for the typical serif font for the title and sans serif font for the standfirst. There is a pull quote which is sectioned out of the article and written over the top of the image. The article is a Q&A where the questions are a little larger and bolder than the answers which is the way it usually is in a magazine. There is a drop capital also used in the subcolumn on the left hand side of the second page. A section title is usually at the top of the page and normally in a 'tab' from as this one is.
 
 Looking at these double page spreads gave me the chance to apply the correct terminology while evaluating their good and bad points enabling me to indicate what makes a good double page spread and what makes a bad one when it comes to creating my own.

Wednesday, 2 December 2015

WEEK 4: PRACTISE COLLEGE MAGAZINE COVER

Using the photos we took we had to chose one and create a college magazine cover as a practise for our preliminary task of creating our own college magazine, This is the photo i chose to use:


This is the finished magazine cover: 


I applied the title of 'college' across the top and then also added some coverlines, with the photo itself I upped the brightness slightly and also the contrast so the picture was clearer and warmer looking. I photoshopped in a barcode just underneath the title also.

This gave me the chance to practise once again before carrying out the preliminary task and also gave me the opportunity to practise editing a photo I had taken.

WEEK 4: TAKING OUR OWN PHOTOS

After looking at other magazine covers and doing a practise one we had to do another practise but this time using our owns photos that we had to take ourselves, here are some of our ones:


The photo below is the photo I chose as my final image for my front cover: 


We used our knowledge from evaluating magazines to position ourselves in a way we thought looked best and most professional.

WEEK 3: PRACTISE FRONT COVER

Our Task was to take an image from the internet and turn it into a front cover using the skills we already knew in photoshop alone:


This is the photo I chose before.


I added the title of the magazine and put it behind her head by using the cutout tool in photoshop to cut out the top of her head and making it a separate layer put the text behind it. I then added coverlines around the page making sure not the cover her face and sticking to one colour to make it look simple but sophisticated. However it's a little bit too simple and sparse so I would have to look at moving the cover lines around and maybe adding a few more.

Doing this simple exercise has given me more practise and understanding of how to create a front cover and gives me the chance to improve on my next one.

WEEK 3: FRONT COVER PHOTOGRAPHY

We evaluated magazine front covers and how the people were photographed:


Three person front cover:
Stood even closer together.
The first has one person at the front and the other two getting further away but so they are still in the shot.
Second has all three standing in a line but slightly turned and very close together so they all fit into the shot.
Both Mid-shot
Colour scheme on both.
Direct mode of address.


Four/Five Person front cover:
In both the people are very close together.
One person (maybe the main singer) is front and central while the others are gathered around closely behind.
Colour scheme.
On the second one the front persons head slightly covers the masthead but on the first one this is not the case.

Direct mode of address.


Two People front cover:
These people are stood close together. (shoulder to shoulder)
Their heads cover the masthead again.
They are the main focus, only one cover line.
Colours are simple and few.

Mid-shot again.


One Person front cover:
The positioning of both people on the two magazines are central.
The photos are both mid-shot.
Their heads are covering the mastheads so the magazines must be well known.
They both have direct mode of address.

The colours are very simple.

Looking at these will help me when taking my own photos for my front cover as I know how people should be positioned and what they should look like to make a professional front cover.

Monday, 30 November 2015

WEEK 2: EVALUATING COLLEGE MAGAZINE COVERS

College Magazine Covers:

We evaluated some college magazine front covers we found online to give us an idea of what makes a good college magazine cover so we apply those when creating our own college magazine.


The layout of this magazine works well. The masthead fits across the top of the page perfectly, the person in the photo is directly centre and the coverlines are written all around him not covering his face. The top of his head goes over the masthead so his eyes are not cut out by it. The colours work well together and are kept very minimal with different shades of blue and a tan colour, the blue fits with the darker blue background of the photograph.


Once again, the masthead fits perfectly across the top of the page, with the persons head covering it partly so we can see them properly, however the masthead can still be read. The cover titles are placed differently to the first and are all down the bottom so the photo is not hidden by them and they are still legible. The colours once again fit the background by using white for the masthead and some of the cover lines and aslo using yellow and a pop of red.


This magazine is a little bit more busy but still works well as a front cover, it is a college football magazine so the business of the front could represent the business of a football match. The photo is an action shot and the person is wearing green and white, the colours of the magazine contrast his uniform by using mainly white and yellow. The coverlines do not cover the photo at all but the photo slightly covers the masthead. The masthead fits well across the top of the page.


The font of this magazine does not fit very well, it looks very unprofessional and the colours do not fit the photo very well. The background of the photo is a garden and was not thought through very well as it does not reflect a college and because of the lighting you cannot see the photo very well. The cover lines are placed randomly around the edge and do not fit a format, the masthead also does not fit across the top.


The photo is much more suited to a college magazine in this as you can see it’s taken outside a college, however the colour scheme does not fit with it. The masthead is placed to the left of the cover and does not go across the entire top which is unconventional. As the previous, the cover lines are placed very randomly all around the magazine and many of them are not legible because of the colour, size and font. The photo does not have direct mode of address so we do not relate to the person on the front.


The masthead for this cover is on two lines which is very unconventional and makes it look unprofessional. The font of the cover lines is in serif but is not very readable, the cover lines are minimal and are not fitted in a professional looking format around the photos, although the front colours fit the photos it is a bleak colour and does appeal to the desired audience. There are also several different fonts which makes it look messy


 Looking at front covers and identifying what makes them good and bad while using the terminology will help me to develop my front cover for my magazine as I know the proper terms for the visual aspects and can apply them to my own knowing what makes it look good.

Monday, 19 October 2015

WEEK 2: TEXT TOOLS AND LAYERS


We worked on creating a practise front cover and were shown how to use the text tools in Photoshop.


TEXT TOOLS:
The text tool in Photoshop looks like this (above). Once clicking it a cursor appeals allowing you to click anywhere on you image to place where you want your writing to be, you then type whatever you want. To adjust your text you highlight what you have written, this enables you to change the font, text size, colour etc. This is all in a bar across the top, you can also adjust the smaller details such as the height of the letters, the spacing between the letters and the width of the letters.


LAYERS:
The text becomes a separate layer to the photo and you can cut out the person, making the person and the background two separate layers so you can put the masthead behind the persons head if desired. Using the layers you can also add layer effects such as drop shadow and bevel.


These skills are useful for making our magazine as we can not only add text but also alter it to however we want and easily move and change it as desired.


Monday, 5 October 2015

WEEK 1: Photoshop Skills cont.

LASSO TOOL:

The Lasso Tool is mainly used to cut an image out of a background. It looks like this in Photoshop:


There are 3 types of 'Lasso tools' you can use. The first is the normal Lasso Tool, this allows you to draw a freeform selection of whatever you want on your image giving you all the control (I did not use this tool). The second is the Polygonal Lasso Tool, this allows you to draw a selection consisting of line segments, giving you main control with a little bit of help. The last is the Magnetic Lasso Tool, this allows you to draw a selection based on the edge of the image in contrast to the background.

Polygonal Lasso Tool:
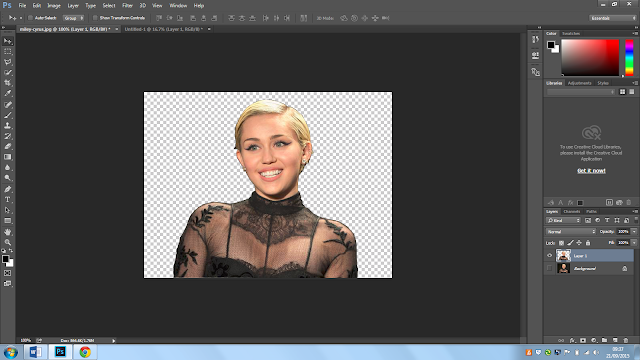
To start you must click on the edge of the image you would like to cut out, it is best if you zoom in so you can see the pixels for this. Then you have go around your image occasionally clicking once to keep your line in place and create the shape you want around your image. To finish you come back around to where your first point was and double click. Finally you copy and paste and you have your two layers one which has the background and one which doesn't. I chose a photo of Miley Cyrus:


Original Photo-


Cut Out using Polygonal Lasso Tool-


Magnetic Lasso Tool:
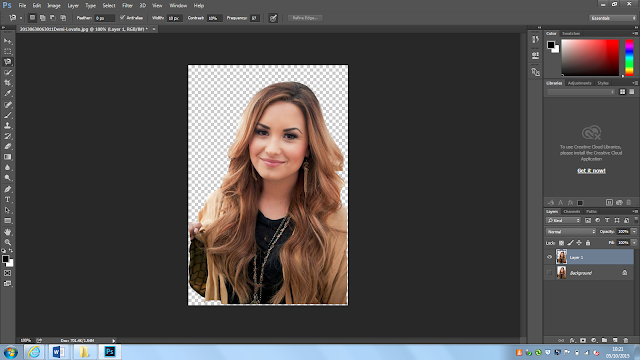
This works best if you have a very contrasting background to you photo, for example you have someone dressed all in white with a black background. You drag your mouse around the person without clicking and the line 'sticks' to the edge of them as it recognises the difference between the background and the person. To finish you do the same as the Polygonal Lasso tool by double clicking back where you started and clicking copy and paste to get the two layers. I chose a photo of Demi Lovato:


Original Photo-


Cut Out using Magnetic Lasso Tool-


Learning how to use this tool will be helpful when creating our front covers. If we have a background that we dislike or would like to put another maybe smaller photo without a background in the corner as a magazine might have this will help us to cut it out with ease. This also introduced us to the use of layers within Photoshop.

WEEK 1: Photoshop Skills


We were shown how to use some basic tools on Photoshop to tidy up an image and then had to give it a go ourselves.

Spot Healing Brush Tool:


This tool can be used to cover spots, it’s automatic and you have no control over how your chosen area is being covered up. When you click on the spot healing brush a small circle comes up, you click, hold and drag the circle over the blemish or damaged area of the photo and the tool blends it into the background assuming that is how you want it to look, thus eliminating the ‘blemish’ you didn’t want. You can adjust the brush size on this tool for more accuracy making it bigger or smaller.

 Healing Brush Tool:


This tool allows you to have control over how your ‘blemish’ is covered. By holding the ‘alt’ button on the keyboard you can click in the area you would like use to cover the ‘blemish’ and then once you’ve let go you can go ahead and click over the ‘blemished’ area to cover it with your chosen cover area. This tool lets you decide how your covered area looks and instead of blending into the background you have the opportunity to include shades.

 Patch Tool:


The Patch tool is good for when you are working with large areas. You can draw around the area you do not want and drag it into an area you want it to look like, covering the unwanted area with another section of the picture. It’s a lot quicker than the Healing brush tool and works well when dealing with bigger unwanted areas.

Clone stamp:


The Clone Stamp tool copies another area of the photo straight onto the unwanted area. By holding ‘alt’ and clicking an area then letting go and clicking in another area, a small + will appear underneath your circle, you can then drag across the areas you would like to cover up and it will copy the area where the + is onto the area you are covering with your circle. You can adjust the brush sizes and also the opacity.

We used these tools on a scratched image in an attempt to almost recover them and make them look a lot better:

BEFORE 


AFTER


By using the Clone Stamp tool you can make wrinkles appear less noticeable, through reducing the opacity you can go over the wrinkles on someone’s face making them ever so slightly disappear however making sure they are still there so it looks realistic. We gave this a go:

BEFORE  


AFTER


This exercise has given us the ability to use these basic tools on Photoshop and these tools will be helpful when creating our magazine covers as we will be able to cover any unwanted ‘blemishes’ on the photos we have taken for our front covers.